Building a Low Cost Virtualization Server with Proxmox-VE and a mini-PC | Part II: Putting it Togeth
- Kenneth LaCroix
- Jun 13, 2017
- 2 min read

I of a IV part series.
Part II: Putting it together
Part III: Installing Proxmox VE and spinning up pfSense and other VM's
Part IV: Gotchas and other lessons learned
Introduction. In the last section, I discussed the what and why of a low-cost virtualization server powered by Proxmox, a project similar to Vmware's ESXi. This section is more of the how, of putting the actual server together. If you have ever built a computer before, it is, of course, the same process; install the CPU and heatsink, insert the memory into the slot and attach and connect the hard drive. I have included a gallery of images, which is found below, of the system.
Caution. Be sure to discharge the static electricity in your body by touching a piece of bare metal. Failure to do so could ruin sensitive components such as the CPU.
Installing the CPU. Taking apart and putting together my first PC years ago, I did not align the pins on the bottom of the CPU when closing the arm, which ruined the CPU because a few pins got bent. These days, at least on this particular processor, this is impossible. It is also impossible to insert the CPU the wrong way. Just match the indicator on the side of the CPU to that of the motherboard and it will slide into the socket just fine. When done, lower and snap the arm into its place.
Installing the Heat Sink. The G4560 processor included a heat sink and thermal paste. Push down on the four stems until there is a click. Ensure proper installation.
Installing the RAM. Align the notch at the bottom of the memory stick with that on the motherboard and push down until you hear a click from the two side retainers.
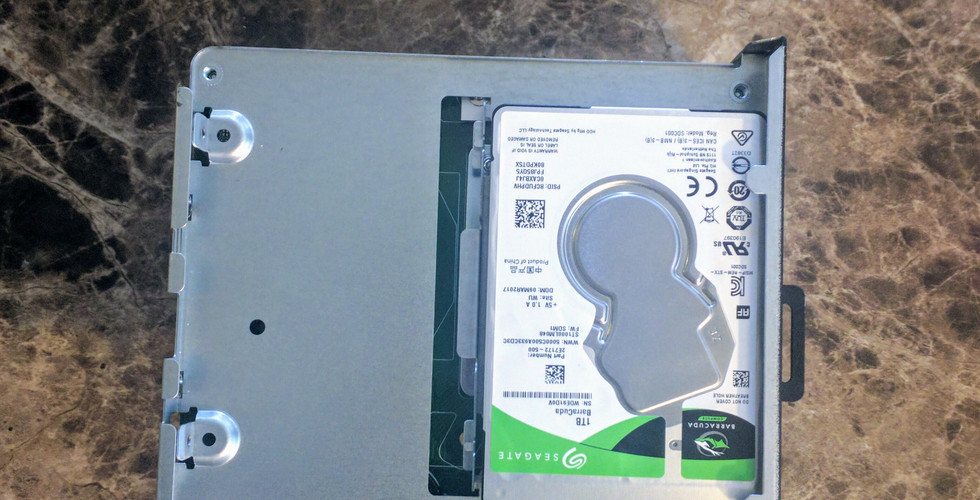
Installing the HDD. Located the on the bottom of the motherboard are screw holes for the HDD. Included with the Deskmini are two SATA3 headers and the appropriate connections for 2.5"drives.
What's Next: Installing Proxmox and spinning up a few VM's.


Comments